
 ChatGPT
 Perplexity
 Gemini
 Claude
Kling AI can produce impressive image-to-video clips, but it also punishes vague prompts.
If you upload a good image, choose a long duration, ask for dramatic movement, enable advanced features, and rerun the same idea several times, you may spend credits before you understand what actually failed. The smarter workflow is simpler: test one short motion, protect the subject, keep the camera language specific, then scale only the clips that already work.
This guide shows how to use Kling AI image to video with practical prompts, safer settings, and credit-aware decisions.
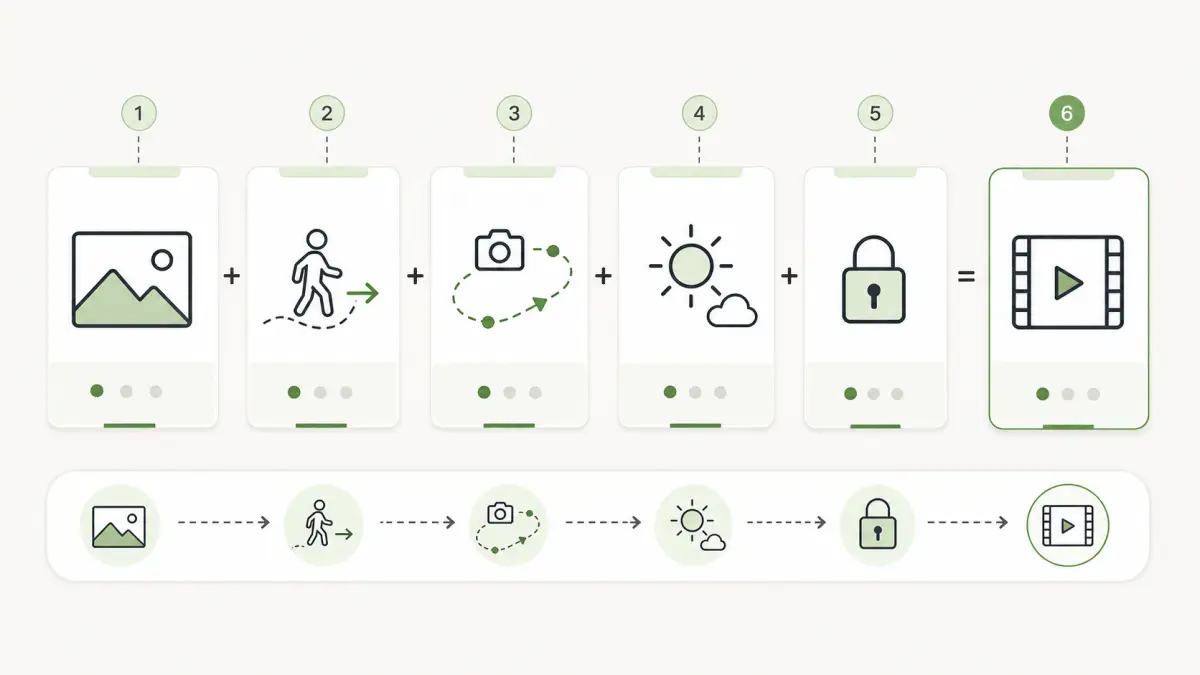
Quick Answer
Kling AI image to video is best for creators who want more control than a basic photo animation tool: clearer camera movement, subject consistency, start and end frame workflows, multi-shot scenes, native audio in supported Kling VIDEO workflows, and up to 15-second generation in Kling VIDEO 3.0. Kling's own VIDEO 3.0 guide describes image-to-video support, start and end frames, multi-shot generation, native audio, enhanced subject consistency, and flexible 3-15 second duration.
The best starting point is not the maximum setting. Use a clean source image, a 5-6 second test, one camera move, one visible subject action, and strict preservation constraints. If the image is a portrait, product, logo, old photo, or character reference, avoid extreme orbit shots and strong acting until a subtle version works.
If you want to compare prompts before committing to a Kling-heavy workflow, you can test an image-to-video prompt with one uploaded photo and keep the source image, duration, and aspect ratio consistent while changing only the motion prompt.
What Is Kling AI Image to Video?
Kling AI image to video turns a still image into a generated video clip. In the simplest version, your uploaded image becomes the visual anchor: the model adds subject movement, environmental motion, and camera movement while trying to preserve the original scene.
The important difference is control. Kling is not only a "make this photo move" tool. Its current public guides position Kling VIDEO 3.0 around stronger prompt adherence, multi-shot direction, element consistency, longer duration, native audio, and reference-driven workflows. That makes it useful for:
- Portrait clips where the face should stay recognizable
- Product shots where packaging, labels, shape, and color matter
- Social clips that need camera movement rather than random drifting
- Story scenes where a reference character or object must persist
- Start and end frame workflows where the clip needs a planned transition
That control comes with a tradeoff: prompts, settings, and credits matter more. A loose prompt can still make a beautiful clip, but a production workflow needs repeatable results.
How to Use Kling AI Image to Video
Use this workflow when you want a clean first result instead of a pile of failed generations.
Step 1: Prepare a clean source image
Start with an image that already looks like the first frame of a video. Kling can add motion, but it cannot read your intention if the subject is tiny, cropped awkwardly, blurry, over-filtered, or hidden behind clutter.
Use images with:
- One clear main subject
- Enough space around the subject for camera movement
- Sharp faces, hands, product labels, or important details
- Stable lighting without harsh artifacts
- A composition that already matches the final platform when possible
Avoid using a tightly cropped portrait if you want a strong pan or orbit. Avoid a product photo with tiny label text if the label must remain exact. Avoid old photos with severe blur unless you want only gentle motion.
Step 2: Choose the right Kling workflow
Use standard image-to-video when you only need to animate one still image. Use start and end frame workflows when you have a planned transformation, product reveal, before/after movement, or a specific final pose. Use element reference or subject binding when the same person, character, product, or object must stay stable across shots.
Kling's public guide describes element binding as a way to lock specific elements so a main character remains stable during camera movements such as zooming, panning, or tilting. Its subject binding guide also frames the feature around reducing feature drift across shots.
The shortcut: do not turn on advanced reference workflows for every casual clip. Use them when consistency is part of the job, not just because the option exists.
Step 3: Write a motion-first prompt
Kling's prompt guide recommends clear scene direction: subject, action, setting, camera language, lighting, and mood. For image-to-video work, add constraints that protect the uploaded image.
A practical structure is:
[Shot type] of [subject from the uploaded image]. [Small visible subject motion].
The camera [one specific movement] at a [speed] pace.
[Lighting and visual style].
Keep [identity/product/scene detail] unchanged.
No cuts, no warping, no extra limbs, no text changes.
Duration [x] seconds, aspect ratio [x:y].
The most common mistake is stacking too much into one prompt: orbit, zoom, handheld shake, dramatic acting, wind, background transformation, and dialogue. That gives the model too many ways to invent.
Step 4: Start with low-risk settings
For the first test, use a short duration and one gentle movement. Do not test prompt quality with the longest duration and most expensive output path.
A safe first generation usually looks like this:
- Duration: 5-6 seconds
- Motion: subtle subject movement plus one camera move
- Camera: locked-off, slow push-in, gentle pull-back, small pan, or small tilt
- Aspect ratio: match the final channel, such as 9:16 for TikTok or Reels
- Resolution: start with the default or review-friendly quality, then upgrade only if the result works
- References: use subject binding only when identity or product consistency matters
Once the clip works, increase quality, duration, resolution, or reference complexity.
Step 5: Review before rerunning
Before spending another generation, decide what failed. Was the face distorted? Did the camera move too much? Did the product label change? Was the prompt too vague? Did the source image have too little background space?
Do not rerun the same prompt blindly. Change one thing at a time:
- Reduce motion
- Shorten duration
- Switch from orbit to push-in
- Add a subject preservation constraint
- Use a cleaner source image
- Use subject binding for recurring people or products
This is the habit that saves the most credits.
Best Kling AI Settings by Use Case
Kling's best settings depend on what you are trying to preserve. A face, a product label, and a landscape do not fail in the same way.
| Use case | Safer starting settings | Prompt focus | What to avoid |
|---|---|---|---|
| Portrait or selfie | 5 seconds, 9:16 or 1:1, locked-off or slow push-in | Tiny expression change, breathing, eye movement, soft light, keep identity unchanged | Strong head turns, talking, orbit, dramatic emotion on the first test |
| Product photo | 5-6 seconds, 9:16 or 16:9, slow push-in or partial turntable | Keep shape, label, material, logo, and packaging unchanged | Full 360 orbit from one flat image, liquid splashes, label text changes |
| Old family photo | 5 seconds, 4:5 or 16:9, locked camera or very slow push-in | Gentle blink, tiny smile, subtle ambient light, preserve face | Big gestures, modern background changes, strong facial expression |
| Fashion or character | 5-8 seconds, 9:16, gentle tracking or push-in | Outfit consistency, hair consistency, controlled body motion | Fast dancing, changing clothes, extreme camera angle changes |
| Cinematic landscape | 6-10 seconds, 16:9, pan, tilt, pull-back, or aerial-style movement | Atmosphere, lighting, clouds, water, wind, camera path | Too many scene changes, sudden cuts, unclear subject anchor |
| Story or multi-shot scene | 8-15 seconds, 16:9, multi-shot only after a simple test works | Shot order, character references, dialogue clarity, scene coverage | Starting with a long multi-shot scene before testing the character and setting |
| Social hook clip | 5-6 seconds, 9:16, stronger but simple movement | First 2 seconds, readable subject, one clear visual change | Horizontal framing, slow opening, complex story setup |
The best default for most users is a 5-second clip with a slow push-in. It adds life without forcing Kling to invent hidden sides of the subject.

Copy-Paste Kling AI Image to Video Prompts
Use these as starting points. Replace the bracketed details, then keep the first generation conservative.
Portrait Prompt
Medium portrait shot of [person in the uploaded image]. The person keeps the same face, hairstyle, clothing, and calm expression. The camera slowly pushes in toward the face with smooth motion. Soft natural light moves gently across the scene. Keep identity unchanged, no face morphing, no new accessories, no cuts, no background change. Duration 5 seconds, aspect ratio 9:16.Product Ad Prompt
Product hero shot of [product in the uploaded image] on the same surface. The product remains still while soft light glides across the material and a subtle reflection appears below it. The camera slowly pushes in from a medium shot to a closer product view. Keep the product shape, label, logo, color, and packaging unchanged. No text changes, no melting, no extra objects, no cuts. Duration 5 seconds, aspect ratio 9:16.Old Photo Prompt
Restored vintage portrait of [person in the uploaded image]. The camera remains almost locked off with a very slow push-in. The person makes a tiny natural blink and a soft relaxed smile. Preserve the original face, age, clothing, and historical feeling. No strong expression, no modern objects, no face morphing, no background replacement. Duration 5 seconds, aspect ratio 4:5.Fashion Prompt
Full-body fashion shot of [model in the uploaded image]. The model makes a small natural weight shift while the fabric moves gently. The camera performs a slow vertical tilt from shoes to face, smooth and stable. Keep the outfit, body proportions, hairstyle, and background unchanged. No clothing changes, no extra limbs, no sudden cuts. Duration 6 seconds, aspect ratio 9:16.Food Prompt
Close-up food shot of [dish in the uploaded image]. Steam rises gently and the sauce glistens under soft restaurant lighting. The camera slowly pushes in with shallow depth of field. Keep the dish, plate, table, ingredients, and colors unchanged. No extra food, no melting, no text overlays, no camera shake. Duration 5 seconds, aspect ratio 1:1.Anime Character Prompt
Anime character portrait of [character in the uploaded image]. The character's hair moves slightly in a soft breeze and the eyes make a subtle natural blink. The camera slowly pushes in with a clean cinematic anime look. Keep the same face, outfit, colors, hairstyle, and art style. No redesign, no extra characters, no changing background, no cuts. Duration 5 seconds, aspect ratio 9:16.Cinematic Landscape Prompt
Wide cinematic landscape from the uploaded image. Clouds drift slowly, light moves across the mountains, and water reflects the sky. The camera performs a gentle left-to-right pan with stable perspective. Keep the geography, horizon, color palette, and main landmarks consistent. No sudden cuts, no fantasy objects, no warping. Duration 8 seconds, aspect ratio 16:9.Start and End Frame Prompt
Use the first uploaded image as the opening frame and the second uploaded image as the ending frame. Create a smooth transition between them with one continuous camera movement. The subject moves naturally from the first pose to the final pose while keeping identity, clothing, lighting, and background consistent. No sudden cuts, no face distortion, no extra objects. Duration 6 seconds, aspect ratio 9:16.Kling AI Credits, Pricing, and Cost Control
Kling AI uses credits and memberships, so cost planning should be part of the creative workflow. The exact price of a generation can depend on model, resolution, duration, audio, multi-shot use, reference features, and the current product interface.
For a stable public baseline, Kling's credits policy lists a standard purchase reference of $1 USD = 66 Credits. Kling's paid service terms also say purchased credits and membership credits can have different validity periods, and that users should check credit balance and usage records in the product. Kling's own credit cost guide says credit planning should account for model, feature, resolution, duration, and the current workflow shown at generation time.
Use this as a planning checklist, not as a permanent pricing sheet:
| Decision | Why it affects credits | Safer starting point |
|---|---|---|
| Duration | Longer clips usually create more room for failure and may cost more | Test 5-6 seconds before 10-15 seconds |
| Resolution or 4K | Higher resolution can be useful for final delivery but is wasteful for prompt testing | Validate motion first, upscale or regenerate later |
| Native audio | Dialogue and sound add review complexity | Test silent visuals before audio scenes |
| Multi-shot | More shots create more continuity checks | Prove the subject and setting in a single shot first |
| Subject binding | Reference setup can improve consistency but adds workflow overhead | Use it for recurring people, products, or characters |
| Prompt complexity | Complex prompts fail in more ways | One action plus one camera move |
| Reruns | Repeating the same bad prompt burns credits | Diagnose the failure and change one variable |
The practical rule is simple: spend small credits to learn, then spend bigger credits to finish. If a product label changes in a 5-second test, it will not magically become reliable in a longer high-quality generation.
Common Mistakes and Fixes
Most bad outputs come from a mismatch between the source image, the motion request, and the settings.
| Problem | Likely cause | Fix |
|---|---|---|
| Face changes or looks uncanny | Motion is too strong, source face is blurry, prompt lacks identity constraints | Use a sharper image, locked camera or slow push-in, and "keep identity unchanged" |
| Product label changes | Orbit or strong movement asks the model to invent hidden label details | Use push-in, partial turn, or light movement; add "keep logo and label text unchanged" |
| Background melts | Prompt asks for complex camera movement from a flat or cluttered image | Reduce camera movement and add "stable background, no warping" |
| Clip feels static | Prompt only describes the subject, not the motion | Add one visible subject action plus one camera movement |
| Camera feels random | Prompt says "cinematic" without a path | Write "slow push-in", "gentle left-to-right pan", or "locked-off camera" |
| Hands deform | Hands are small, cropped, or asked to perform complex action | Avoid hand actions unless hands are clear; keep motion environmental |
| Credits disappear quickly | Long settings and vague prompts are being tested together | Shorten duration, simplify prompt, review one failure at a time |
| Watermark surprise | Plan/export rules were not checked before production | Check the current membership and export screen before using clips commercially |
If your goal is a person, avatar, restored photo, or profile image, it may be better to use a softer portrait animation workflow before asking for dramatic acting or wide camera movement.
Kling AI vs Other Image-to-Video Options
Kling is strong when you want control. It is not always the fastest path for a simple photo animation.
| Tool or workflow | Best for | Main tradeoff |
|---|---|---|
| Kling AI | Controlled motion, subject consistency, cinematic image-to-video, multi-shot scenes | More settings and credit planning |
| Runway | Broader creator suite, editing, references, team workflow | Heavier if you only need one quick clip |
| Google Veo | Cinematic quality, API and product ecosystem workflows | Access, pricing, and workflow can be more technical |
| Hailuo / MiniMax | Fast dynamic motion tests | Can be less predictable for delicate identity work |
| Vidu or Pika | Social effects, stylized clips, quick creative variations | Not always ideal for strict product or portrait preservation |
| PhotoToVideoAI | Low-friction testing from one uploaded photo | Final behavior depends on the selected model and task |
Choose Kling when the clip needs stronger control: a recurring character, a product that must remain accurate, a cinematic camera move, or a storyboard-like scene. Choose a simpler photo-first workflow when you want to test ideas quickly without managing many model-specific options.
Who Should Use Kling AI?
Kling is a good fit if you care about control more than pure speed.
Use Kling when:
- You need a short cinematic clip from a strong source image
- You want camera movement that responds to specific direction
- You are testing character or product consistency
- You can afford several review iterations
- You are willing to write precise prompts
- You need longer or more narrative clips after the short test works
Consider a simpler workflow first when:
- You only need a quick social animation from one photo
- You do not know which model fits your image
- You want to compare subtle and strong motion quickly
- You are testing many product or portrait variations
- You want to avoid learning a complex credit and setting system before the idea is proven
The best workflow is often hybrid: use a fast photo-to-video generator for early prompt exploration, then use Kling when you know the shot is worth refining.
Source Notes
Kling updates quickly, so use the sources below as publishing-time references and check the live product before a paid project:
- Kling VIDEO 3.0 Model User Guide
- Kling AI Prompt Guide
- Kling 3.0 Subject Binding
- Kling Credits Policy
- Kling Paid Service Terms
- Kling 3.0 Credit Cost Guide
FAQ
Is Kling AI good for image to video?
Yes. Kling AI is especially useful when you need controlled camera movement, subject consistency, start and end frame workflows, or cinematic motion from a source image. It is strongest when the uploaded image is clean and the prompt gives one clear movement plan.
Is Kling AI free to use?
Kling has offered free and paid routes, but free access, credits, watermark rules, commercial-use rights, and feature availability can change. Check your live account, generation panel, and membership page before planning a real project.
How many credits does Kling AI video use?
Credit use depends on the model, duration, resolution, audio, reference features, multi-shot options, and the current product interface. Kling's official credits policy lists a standard purchase reference of $1 USD = 66 Credits, but you should confirm generation cost in the live panel before creating a batch.
What are the best Kling AI settings for image to video?
Start with 5-6 seconds, one simple motion, the final platform aspect ratio, and conservative camera movement such as a locked-off shot or slow push-in. Add subject binding, longer duration, audio, or higher resolution only after the short test works.
How do I write better Kling AI prompts?
Write like a shot plan: subject, visible action, setting, camera movement, lighting, mood, constraints, duration, and aspect ratio. Avoid stacking several camera moves or dramatic subject actions in the same first test.
How do I stop face distortion in Kling AI?
Use a sharp face image, keep the motion small, avoid extreme head turns, use identity-preserving constraints, and choose slow push-in or locked-off camera movement before orbit or tracking. For recurring people or characters, use subject binding when available.
Does Kling AI add a watermark?
Watermark removal depends on the current plan and export rules. Kling's public plan examples have listed brand watermark removal as a paid benefit, but you should check the export screen and current membership page before publishing.
Is Kling AI better than Runway or Veo?
Kling is strong for controlled image-to-video motion and subject consistency. Runway is stronger when you need a full editing and creator suite. Veo is attractive for cinematic generation and API-oriented workflows. The best choice depends on your source image, budget, and final delivery format.
Conclusion
Kling AI is worth learning if you need more control than a basic image-to-video generator. Its strength is not just that it can animate a photo. Its strength is that, with the right source image and prompt, it can follow camera language, preserve important subjects, support more advanced references, and scale into more cinematic scenes.
Start small: one image, one motion, one camera move, one short duration. Then upgrade settings only when the clip already looks stable. That approach gives you better videos and a much calmer credit budget.